

Every point in a table
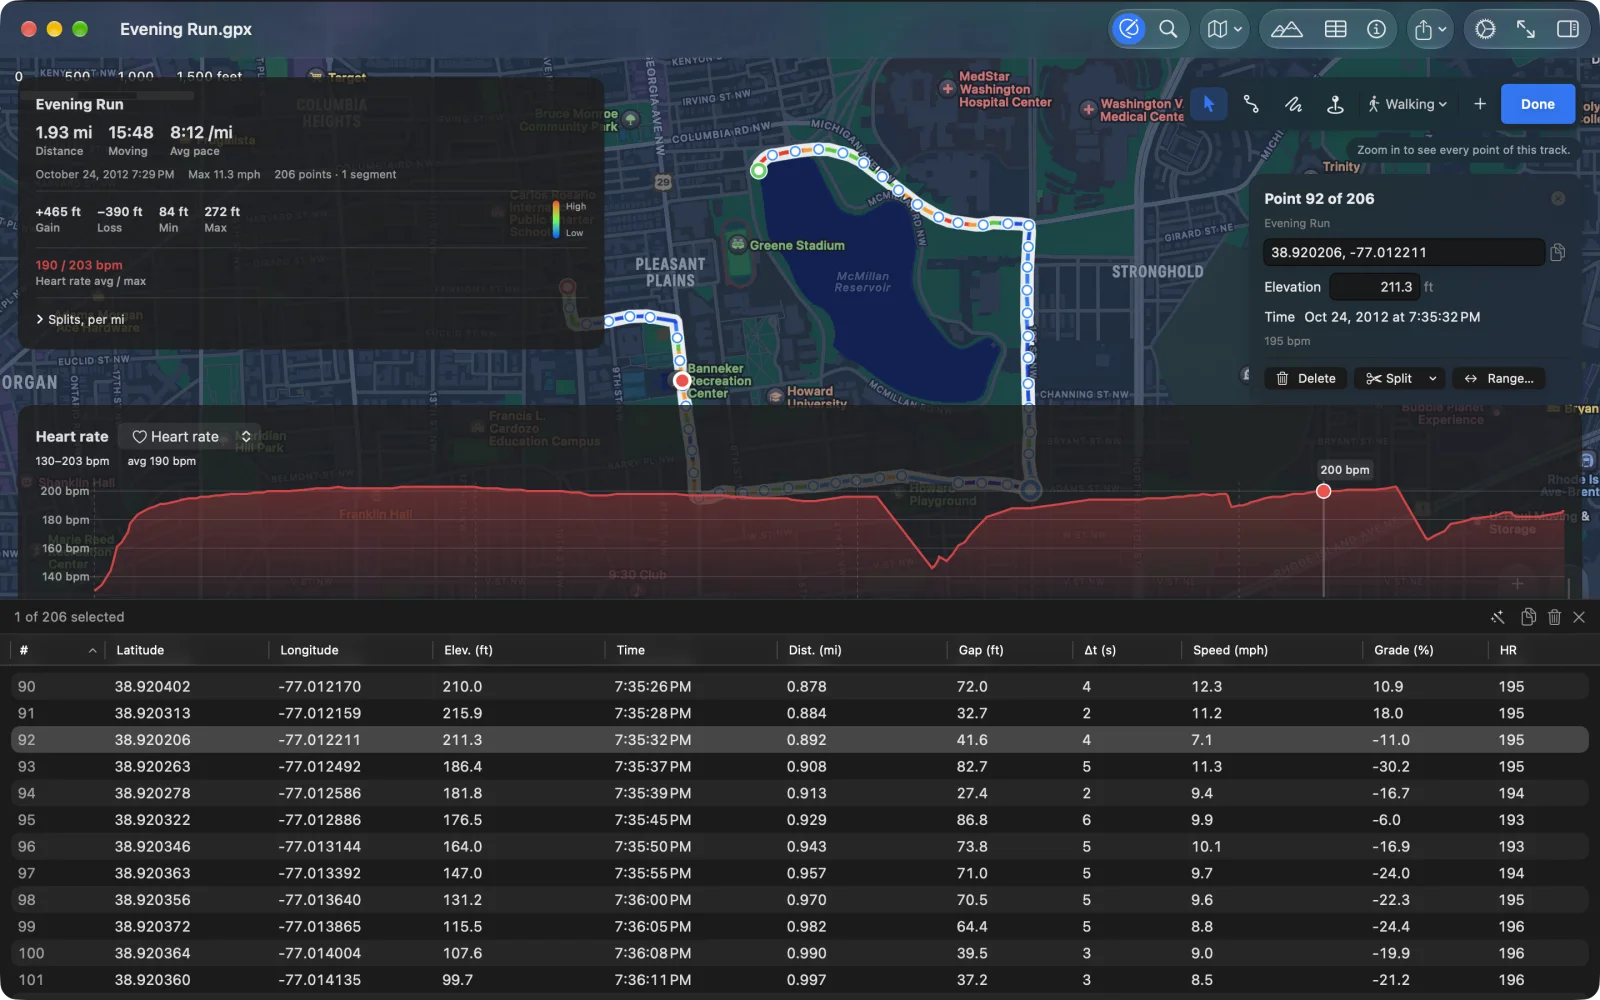
Points in the toolbar (⌥⌘P) shows every point of the selected track as a table: under the map on the Mac (drag the divider to resize it) and on the iPad, and as a sheet on iPhone. It shares the selection with the map and the chart: a row picked here lights up on both, and a point picked there is selected here.
The columns
Section titled “The columns”#, Latitude, Longitude, Elev., Time, Dist. (from the start), then what lies between the point and the one before: Gap, Δt (s), Speed and Grade (%). HR, Cadence and Power appear when the track has them. A dash means the file has no value.
Click a column’s title to sort by it. Sorting is the quick way to find what went wrong: the 400 m gap where the GPS lost the sky, the 90 % grade of a bad altitude reading, the point with no time. With several tracks in the file, the picker at the left of the table’s header switches between them.
On iPhone each row shows the number, elevation, time, gap and grade. Swipe a row to Delete or Edit it; long-press for Edit Point…, Show on Map and Select to Here.
Select, copy and show
Section titled “Select, copy and show”- Click a row, shift-click or ⌘-click for more; ↑ and ↓ move through the rows on the Mac, and the map follows.
- Copy as CSV (the copy button, or right-click) copies the selected rows, or the whole table when nothing is selected, ready to paste into a spreadsheet.
- Show on Map (right-click a row) zooms the map to that point.
Edit points
Section titled “Edit points”These need GPX Explore Pro; asking for one turns on edit mode.
- In a cell: with editing on, select one row, then click a cell of latitude, longitude, elevation, time, heart rate, cadence or power and type. Return keeps it; on the Mac ↑ and ↓ keep it and move a row, as in a spreadsheet. Clear an elevation or a sensor value to remove it.
- Edit Point… (right-click a row, or swipe on iPhone) opens every value of one point in a form.
- Delete (the trash button, or right-click) deletes the selected points, whether or not they are in one run.
The Point Tools menu (the wand) acts on the selection:
| Section | Item | What it does |
|---|---|---|
| Selection | Crop Track to Selection | Keeps only the selected run of points. |
| Selection | Split Track Here | Splits into a new track at the one selected point. |
| Selection | Simplify Selection | Simplifies just the selected run, within 2, 5, 10 or 25 m. |
| Elevation | Elevation from Terrain | Looks up the selected points’ elevation (or every point’s, with nothing selected) from the 30 m terrain model. |
| Elevation | Interpolate Elevation | Gives the run a straight-line elevation between its two ends. |
| Elevation | Smooth Elevation | Averages each point with its neighbours. |
| Time | Interpolate Times | Spreads the times evenly by distance between the run’s two ends. |