
Settings
Settings is ⌘, on the Mac, with three tabs: General, Map and Terrain. Elsewhere it is the gear in the toolbar (or on the start screen), one list with the same sections, closed with Done.
Geo Elevation Pro
Section titled “Geo Elevation Pro”The first section, at the top of General on the Mac. With Pro it says Unlocked. Without it, it offers Unlock Geo Elevation Pro… (on iPhone, iPad and Apple Vision Pro with a line on what Pro adds), which opens the Geo Elevation Pro screen, and Restore Purchases. Under it, “Pro is included with your earlier purchase. Thank you.” when Pro came with an earlier purchase of the app, or, until you have Pro, “Bought Geo Elevation before it became free? Restore Purchases and Pro is yours.” See Geo Elevation Pro.
General
Section titled “General”- Fetch Elevation as You Draw: a path’s profile and an area’s ground are fetched a second after your last change. Turn it off on a metered connection and use Get Elevation (⌘E) instead. On the Mac this is also Elevation ▸ Update Automatically.
- Elevation Data: Mapzen (30 m worldwide, sea floor included) or ASTER (30 m worldwide, land only).
- New Documents: Map Style, Distance Unit, Elevation Unit and Area Unit. Each document remembers its own; these apply to new ones.
On the Map: Shape Names, Side Lengths of the Selected Shape, My Location.
Terrain
Section titled “Terrain”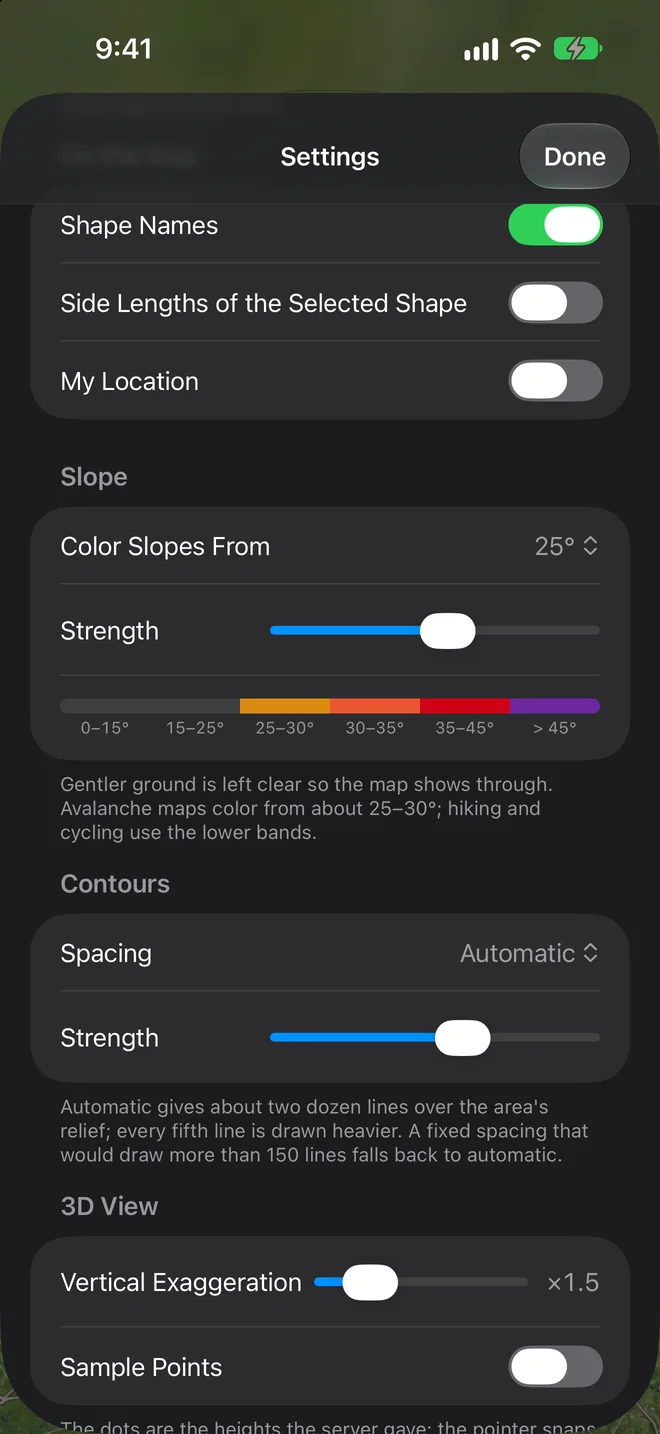
- Slope: Color Slopes From (15°, 25°, 30°, 35° or 45°) and Strength, with a strip showing the bands as they will look.
- Contours: Spacing (Automatic, or a fixed spacing) and Strength.
- 3D View: the default Vertical Exaggeration, and Sample Points, the small dots that show where each height was measured (hidden while slope or contours are on).
Reset to Defaults puts everything back.