

On Apple Vision Pro: View as Object and Stand Here
On Apple Vision Pro, Geo Elevation runs in a window laid out as on iPad (see On iPhone, iPad and Vision Pro). From its 3D view, the block becomes an object you set on a table and walk round, and from the object you can stand on the ground itself, at its true size.
View as Object
Section titled “View as Object”In the 3D view, choose View as Object, beside Export (it is dimmed until the block is built). On the start screen, the cube on a Place’s card opens that place straight into its object.
The block opens in a volume of its own, with its walls and a shadow under it:
- Set it down: drag the volume near a table or the floor and it snaps on. No permission is asked.
- Turn it: drag the block with one hand.
- Size it: use both hands, or the volume’s corner handles. The block fills the volume, from half to three times its first size, and the scale beside it says how large it is (“1:24,000 · 22 in across”).
- Read it: look at a place and pinch. A pin stands on the spot, and its label gives the height and the coordinates; on the Geology ground, the rock, its unit and its age first. Pinch elsewhere to read there; turning or sizing the block puts the label away.
Beside the block are its controls: the place’s name, the height, the ground (Map, Tint, Plain, Geology), Relief, the sun, Gloss, the scale, and for a circle’s block Stand at Center. They are the 3D view’s own settings: a change here shows in the window, and one there shows here. The sun is a menu on Apple Vision Pro, from From the North round to From the Northwest. On Geology the legend stands under the controls.
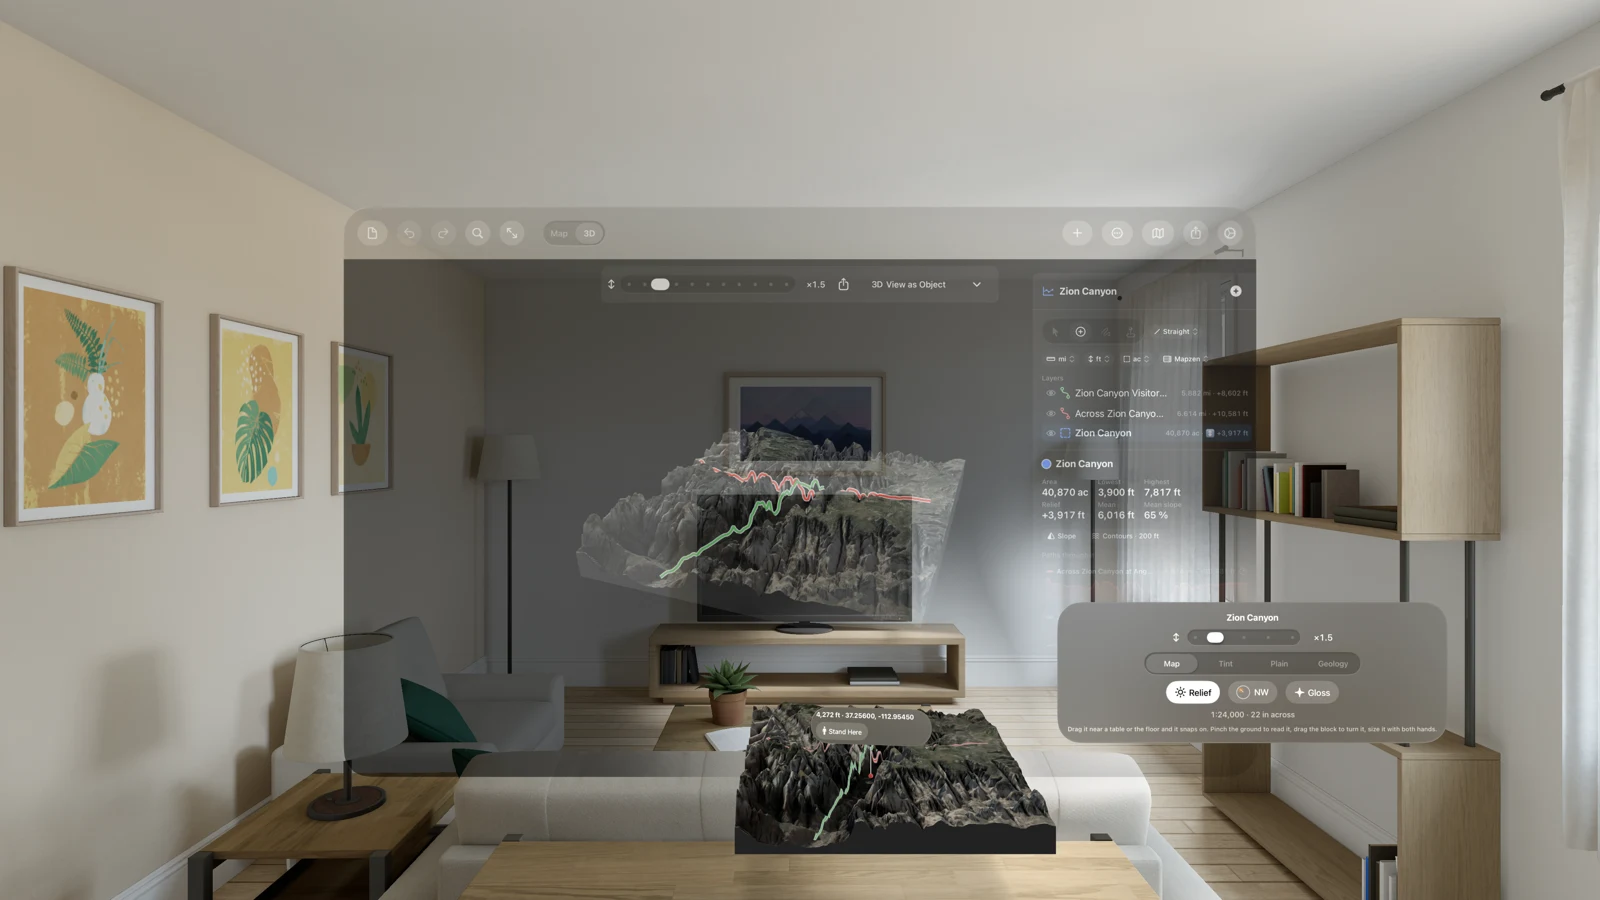
The object shows the block the document’s window makes: close the document’s window and the object goes with it.
Stand Here
Section titled “Stand Here”Pinch a place on the block and choose Stand Here on its label. For a circle’s block, Stand at Center in the controls puts you at the circle’s center instead.
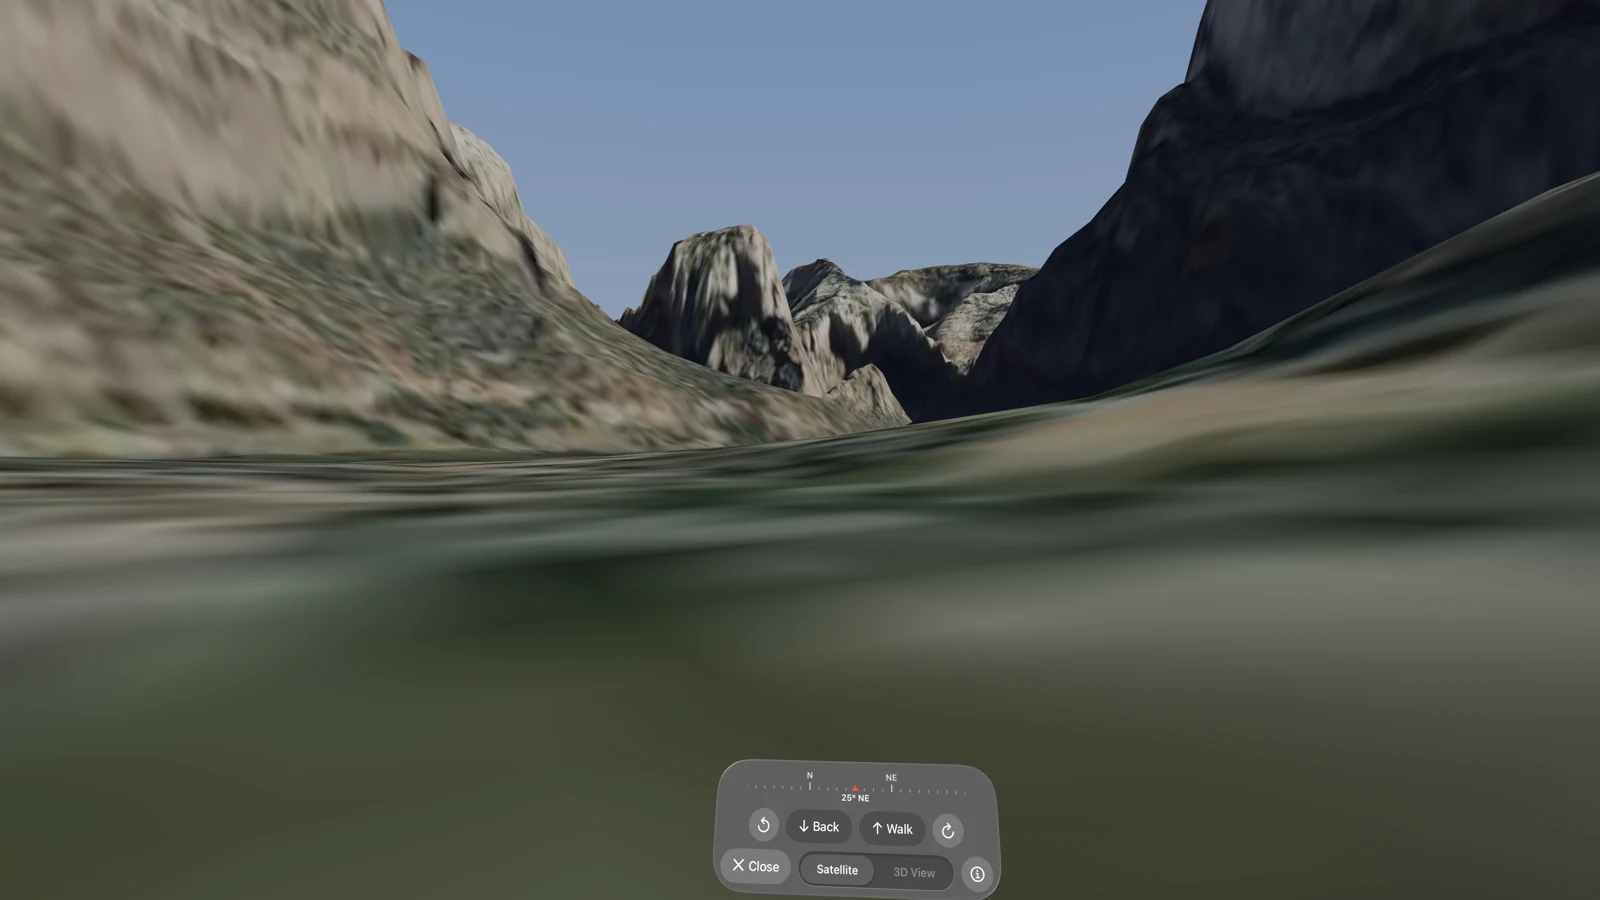
The block flies to your feet, turning to the way you will face and growing to its true size, and the land comes in around you: the ground where you stand in fine detail (5 km across), the block’s ground around it, and the land beyond out to 80 km under a haze, all lowered for the Earth’s curve so the skyline is the real one. You face the block’s summit; at a circle’s center, the way the center sees the most. While you stand, the volume and the document’s window step out of sight where they are.
Your eyes are set at the app’s eye height above the ground, whether you stand or sit: 1.7 meters (5.6 feet), or a circle’s Eye above the center at Stand at Center. As you move, the ground under your feet stays that far below.
The panel
Section titled “The panel”A small panel follows you, just below your eyes:
- The compass: the bearing you face, with the compass points along it.
- The turn arrows (Turn Left and Turn Right): each turns the land 30° round you in one step.
- Back, held: steps you back at a walking pace.
- Walk, held: takes you the way you face at a walking pace, then, held on past a second, faster, up to 15 meters a second (about 50 km/h) to cross a valley.
- Close: back to the object.
- Satellite | 3D View: the ground in Apple’s satellite imagery, or as the 3D view paints it (its ground, light and paths).
- A spinner while the land comes in, and ⓘ (About This Place): where you stand (“Standing at” the height and coordinates), your eye height, at a circle’s center how much of it is in view, what is still loading, and how to get about.
Getting about
Section titled “Getting about”- Walk and turn from the panel.
- Pull the land: pinch the ground and draw it toward you. The place you hold stays on your pinch, so a grip on a far ridge takes you a long way and one at your feet a step.
- Jump: pinch the ground to read it; Stand Here on its label takes you there.
- Your own steps move you too, but only as far as your room allows: use Walk, the turns and the pull to travel.
Inside a circle but away from its center, with Satellite chosen, the circle’s view lies on the ground: green is seen from the center, red is hidden from it.
The Digital Crown and Close
Section titled “The Digital Crown and Close”Turn the Digital Crown to see your room around the land: the far land fades first, and your room takes on the haze of the sky. Close fades the land into the block and flies the block back into its volume; pressing the Digital Crown leaves as well. The volume and the document’s window are back where they were.
What you are looking at
Section titled “What you are looking at”The ground is the elevation data, the same as the 3D view’s: bare ground, no trees and no buildings. The heights come from our elevation server and the satellite imagery from Apple Maps, so Stand Here needs a connection; see Privacy. If the ground cannot be fetched, the panel says so: “The ground here could not be fetched. Check the connection and try again.”
The start screen
Section titled “The start screen”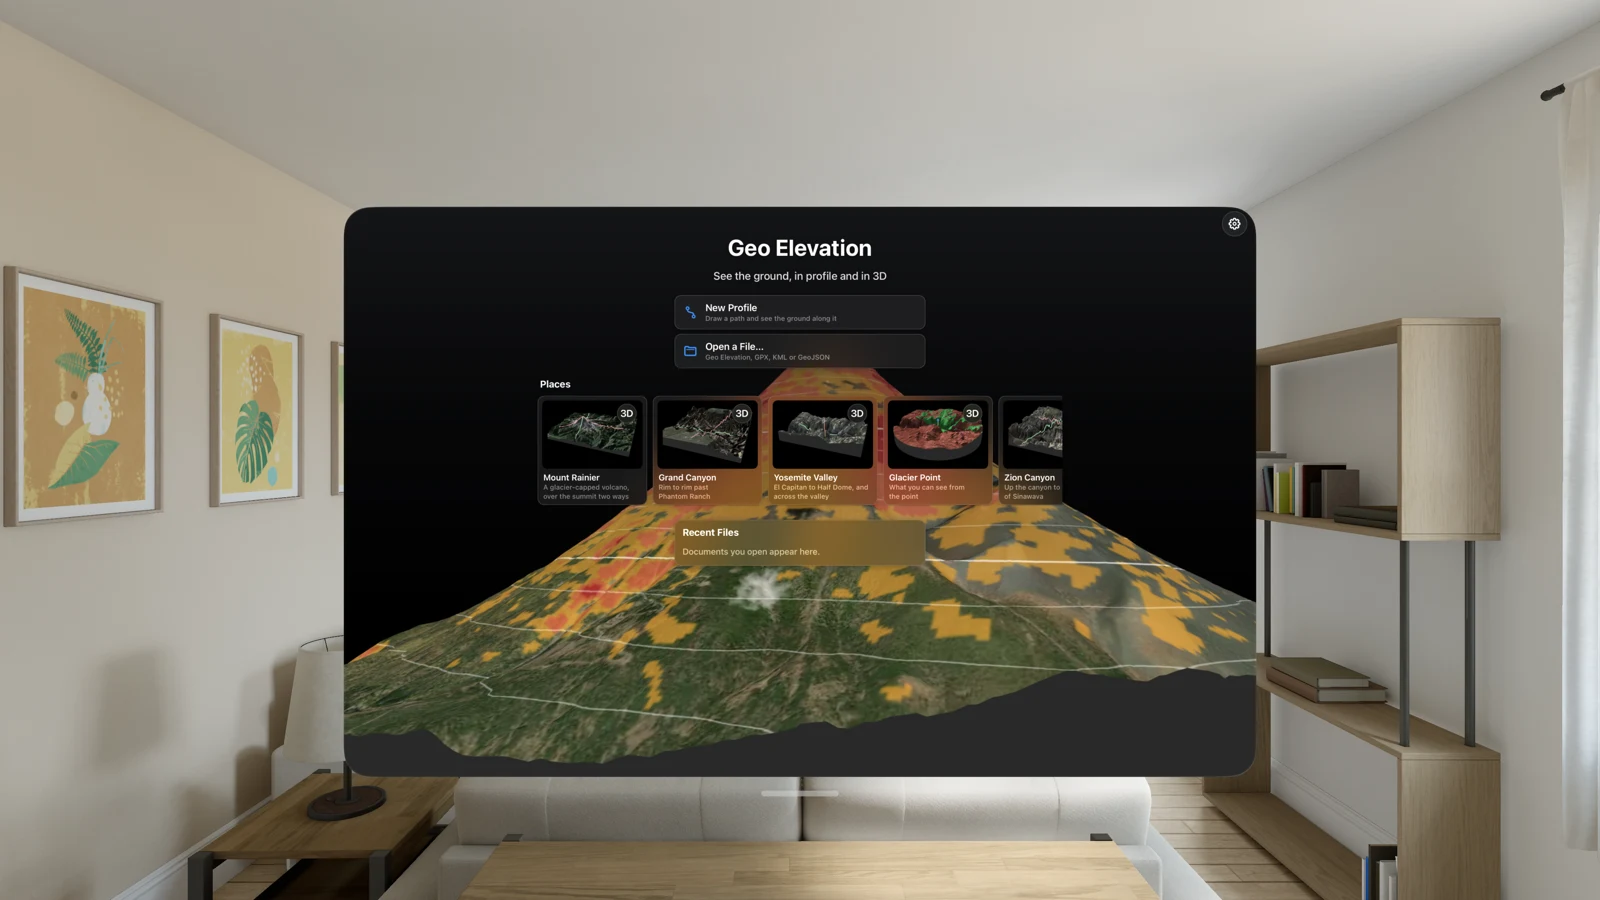
Geo Elevation opens on the start screen, as on iPhone and iPad. A Place’s card opens the place on its 3D view in the window; the cube at the card’s corner (View as Object) goes on into its volume once the block is built.