
Geo Measure
Geo Measure measures areas, distances and circles on a map, in straight lines or along roads and paths. It runs on iPhone, iPad, Mac and Apple Vision Pro; Geo Measure for Mac is the same app sold on its own, and everything here applies to it.
Your first measurement in a minute
Section titled “Your first measurement in a minute”-
Find the place. Search for an address or a name with the magnifying glass (⌘F on the Mac), or scroll and zoom the map to it.
-
Start a shape. Choose New Area for a field, lot or roof, New Distance for a route or a fence line, or New Circle for a radius (⌘1, ⌘2, ⌘3 on the Mac).
-
Choose Add Points and tap the corners. Each tap or click adds a point; an area closes itself. The number appears as soon as there is enough to measure.
-
Adjust. Drag a point to move it, drag the small dot in the middle of an edge to bend the edge, and undo anything with ⌘Z or the undo arrow.
-
Keep it. The document saves itself. Export it as KML, GPX, CSV or GeoJSON, or print a PDF report, from the share button or the File menu.
Getting around the window
Section titled “Getting around the window”Everything you measure lives in a document, which holds as many shapes as you like. A new one is called New Measurement until you save it.
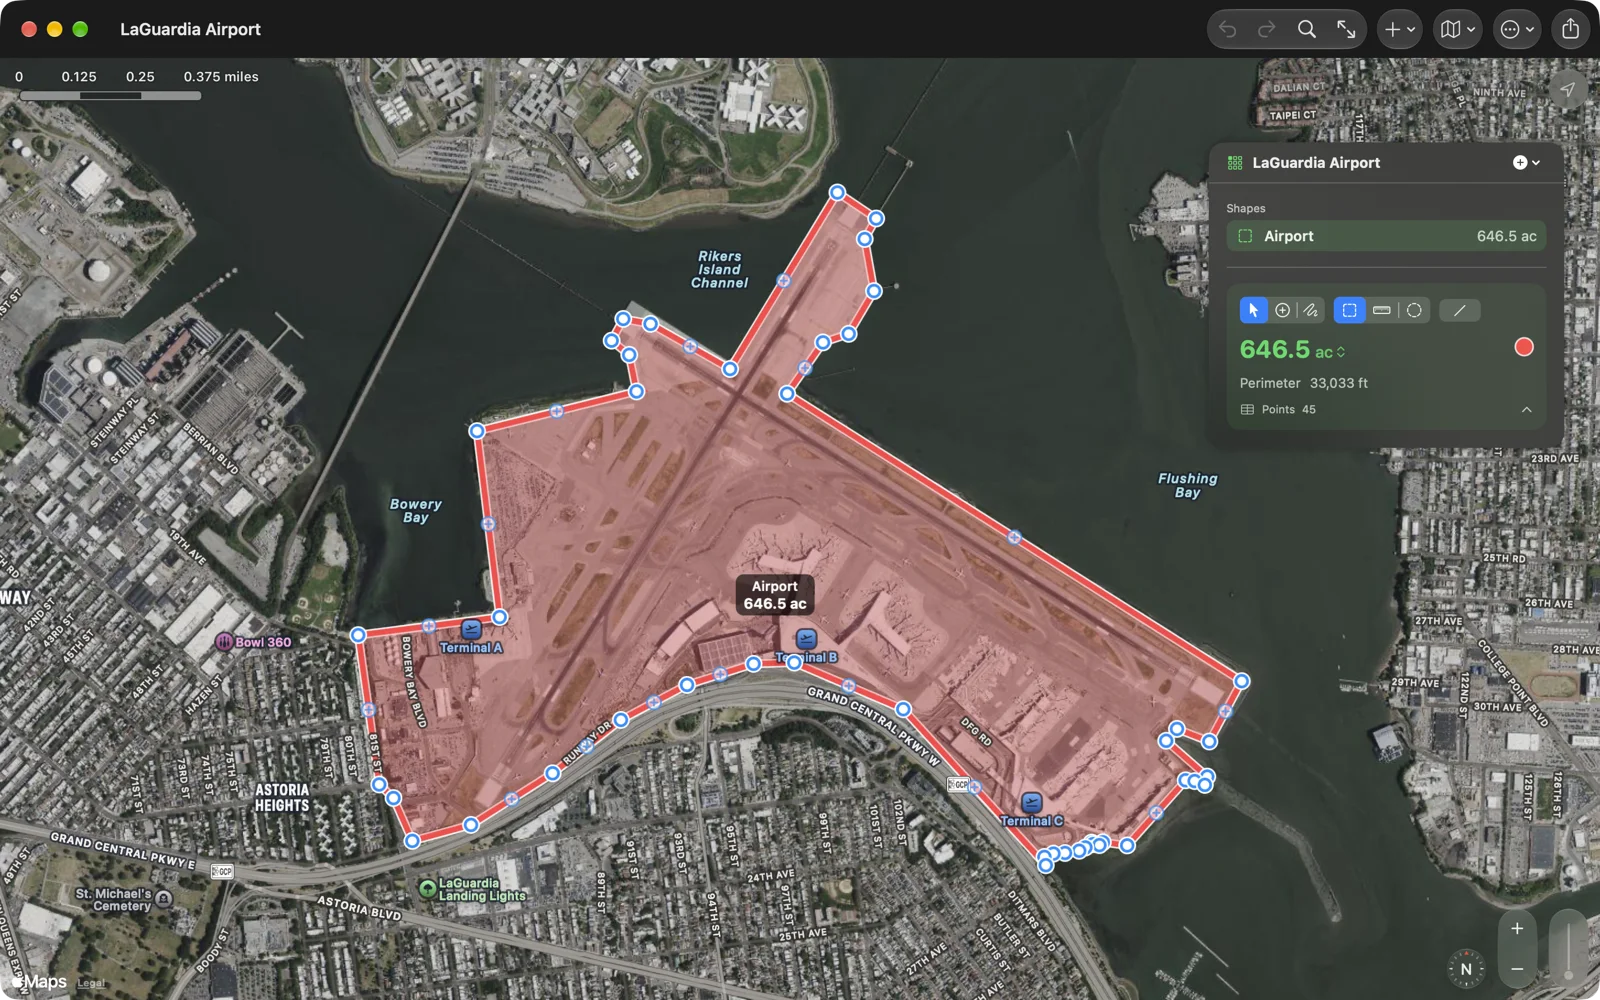
On the Mac, each document is a window: File › New (⌘N) or File › Open… (⌘O). On iPad and Apple Vision Pro, the document’s name at the left of the toolbar is its File menu, with New, Open…, Save and Save As…. On these three, the map fills the window and a panel floats over it on the right with the document’s shapes, the selected shape’s number and its tools. Drag the panel to move it out of the way.
On iPhone the map fills the screen and the controls float on it in glass; see On iPhone and iPad.
A document that opens with shapes starts in the Select tool, so looking around never adds a point; an empty one starts in Add Points.